Shroud of Turin Picture Tour - Part 2 of 5
Detailed examination of the Shroud image including facial features, scourging marks, nail wounds, and evidence of crucifixion.
Facial Features
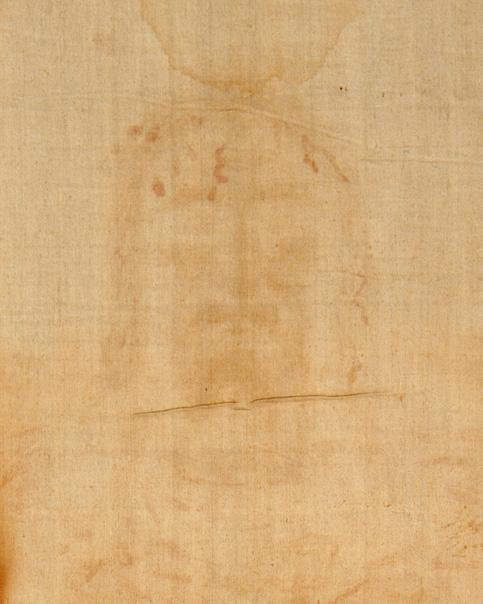
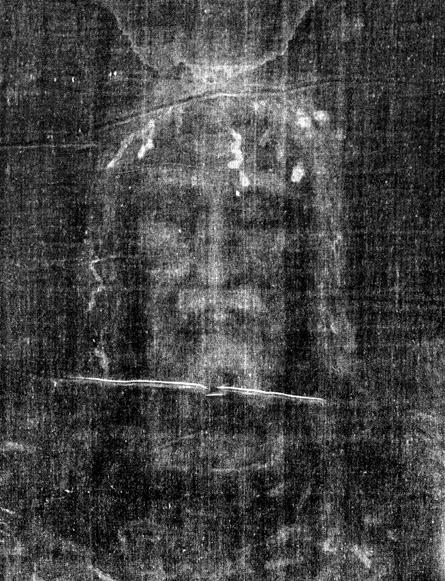
If we study the face, we can see that the man had long flowing hair, a truncated moustache, a long beard, and his eyes are closed. There appears to be swellings on the cheeks and the bridge of the nose also appears swollen. There are areas on the forehead which appear to be blood stains.
SLIDE 8 - Close Up of the Face
Left - Negative image (as it appears to the naked eye) | Right - Positive image (as seen on the negative plate)
Photos: ©1978 Barrie M. Schwortz Collection, STERA, Inc.
The Dorsal (Back) Image
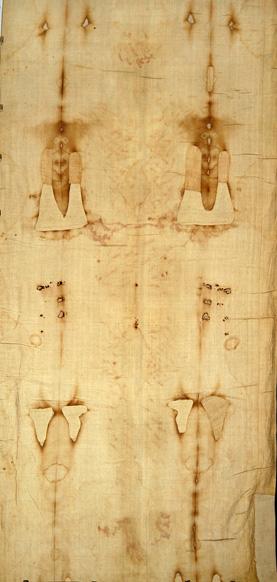
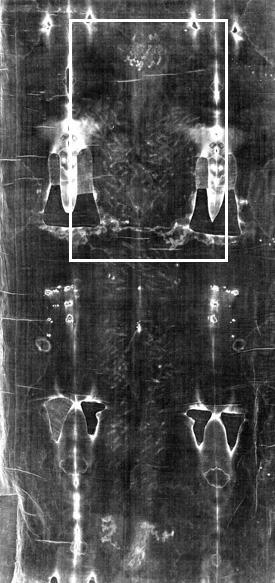
On this dorsal imprint we can see the back of the head which is covered with blood stains from puncture wounds. If these puncture wounds were caused by a crown of thorns, then the crown was not in the shape of a ringlet as widely believed but in the shape of a bushy cap which covered the entire head, since the puncture wounds appear throughout the head right up to the vertex or top.
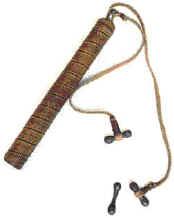
Also, we can see numerous marks across the back. These marks appear in the shape of tiny knots or dumbbells and there are over 100 of these marks occurring in groups of two's and three's covering the entire body. These marks are likely the result of some type of scourging. From studying the size and shape of these marks and historical records we can identify the scourging instrument as the Roman Flagrum. This instrument has been found in archeological digs and is shown in Slide 10.
We can also see in the regions of the shoulder blades quadrangular (four sided) bruises caused by an object that medical experts estimate would have weighed between 80-100 pounds. The entire cross consisted of an upright portion which remained in the ground at the sight of crucifixion and a cross bar which was later attached. Victims of crucifixion only carried the cross bar and not the entire cross. Since the bruises are over the scourging, this indicates that the person was first scourged and then made to carry the cross bar of a cross.
SLIDE 9 - Dorsal (Back) Imprint
Left - Back imprint (negative image) | Center - Back imprint (positive image) | Right - Area in white box enlarged (negative image)
Photos: ©1978 Barrie M. Schwortz Collection, STERA, Inc. | ©1931 Giuseppe Enrie
The Roman Flagrum
This instrument was used in the First Century by the Romans to scourge their victims. It consisted of a wooden handle with 2 or 3 straps and at the end of these straps were small lead balls. This instrument would break the skin and cause a deep and extremely painful bruise. We can deduce by the angles by which the marks radiate on the Shroud that two people scourged this person, one on the left and one on the right. In fact, the person on the right was taller than the person on the left.
SLIDE 10 - Roman Flagrum Used for Scourging
Wounds on the Wrists and Side
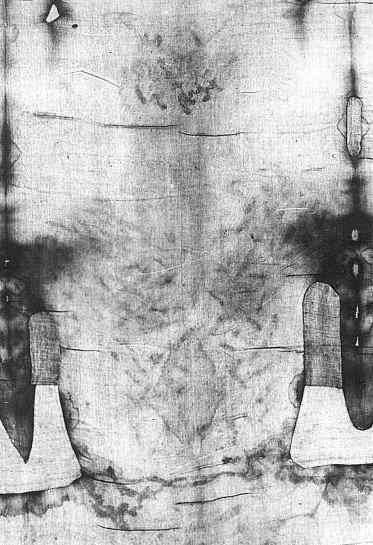
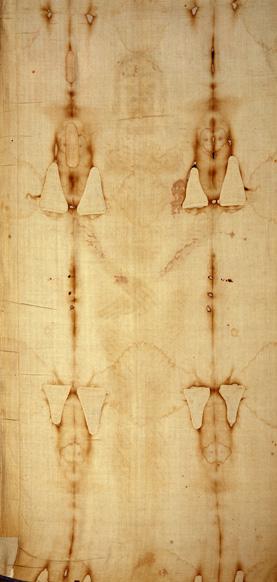
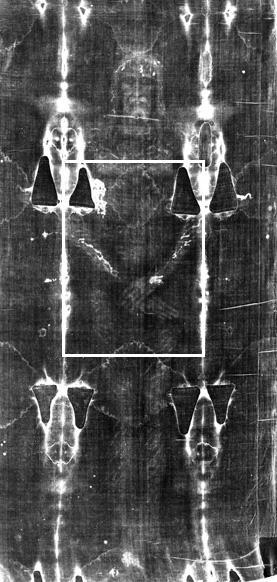
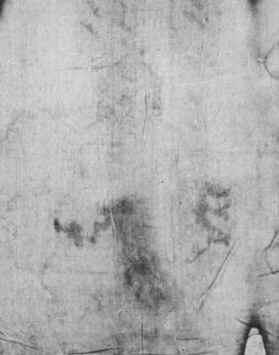
This frontal image shows the forearms, wrist, and hands. There appears to be a large puncture wound on the wrist. This is significant because if nails were placed through the palms of the hand, this would not provide sufficient support to hold the body to the cross and tearing of the hands would occur. Only if the nails were placed through the wrists would this provide sufficient support to hold the body fixed to the cross.
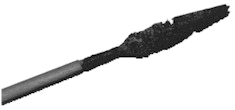
We can also see a large blood stain and elliptical wound on the person's right side (remember, in a negative imprint left and right are reversed). From studying the size and shape of this wound and historical records, we can deduce that this wound could have been caused by a Roman Lancea. This lance is pictured in Slide 13.
In addition, by measuring the angle of dried blood on the wrist, one can reconstruct the angle at which this person hung from the cross. He mainly hung from a position 65 degrees from the horizontal. But there is another angle of dried blood at 55 degrees. This shows that this person tried to lift himself up by 10 degrees. Why? Medical studies show that if a person just hangs from a position of 65 degrees in would start to suffocate very quickly. Only if he could lift himself up by about 10 degrees would he be able to breathe. Thus he would have to raise himself up by this 10 degrees by pushing down on his feet which would have to have been fixed to the cross. He would then become exhausted and fall down again to the 65 degree position. Thus, he would continue to shift from these two agonizing positions throughout crucifixion. That is why the executioners of crucifixion would break the legs of their victims to speed up death. If they could not lift themselves up to breathe, they would suffocate very quickly.
SLIDE 11 - Frontal Image
Left - Front imprint (negative image) | Center - Front imprint (positive image) | Right - Area in white box enlarged (negative image)
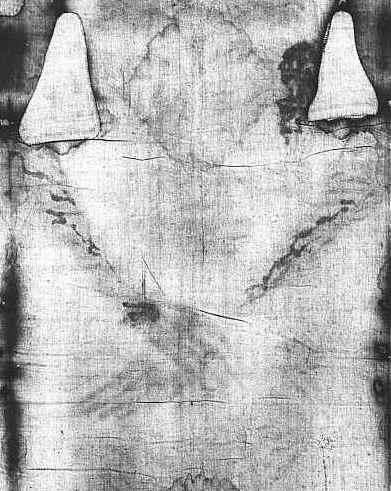
Photos: ©1978 Barrie M. Schwortz Collection, STERA, Inc. | ©1931 Giuseppe Enrie
SLIDE 12 - First Century Nail
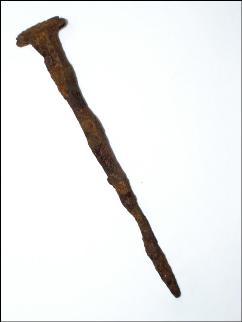
Photo: Copyright Paul C. Maloney, Ancient Near Eastern Researches
SLIDE 13 - First Century Roman Lancea
The Feet
On this dorsal image the imprint of the right foot can be seen. It appears that two nails were used. One was first placed through the right ankle joint and this fixed the right foot to the cross. Then the left foot was placed over the right and a second nail driven through the fleshy section of both feet.
SLIDE 14 - Dorsal Image Showing the Back of the Feet
Left - Back imprint (negative image) | Right - Area in white box enlarged (negative image)
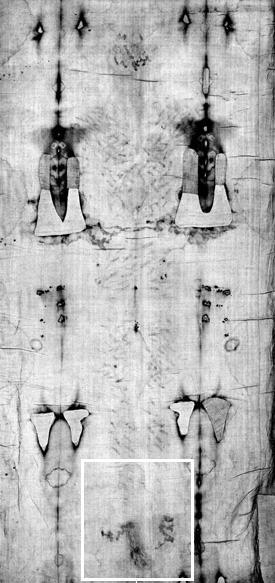
Photos: ©1931 Giuseppe Enrie